This guide will walk you through removing the rear panel on your Anycubic Kobra S1.
TABLE OF CONTENTS
- Step 1: Remove the rear cover
- Step 2: Remove the two side covers
- Step 3: Remove the front door
- Step 4: Disassemble the control screen assembly
- Step 5: Remove the front cover
- 3. Installation steps:
Step 1: Remove the rear cover
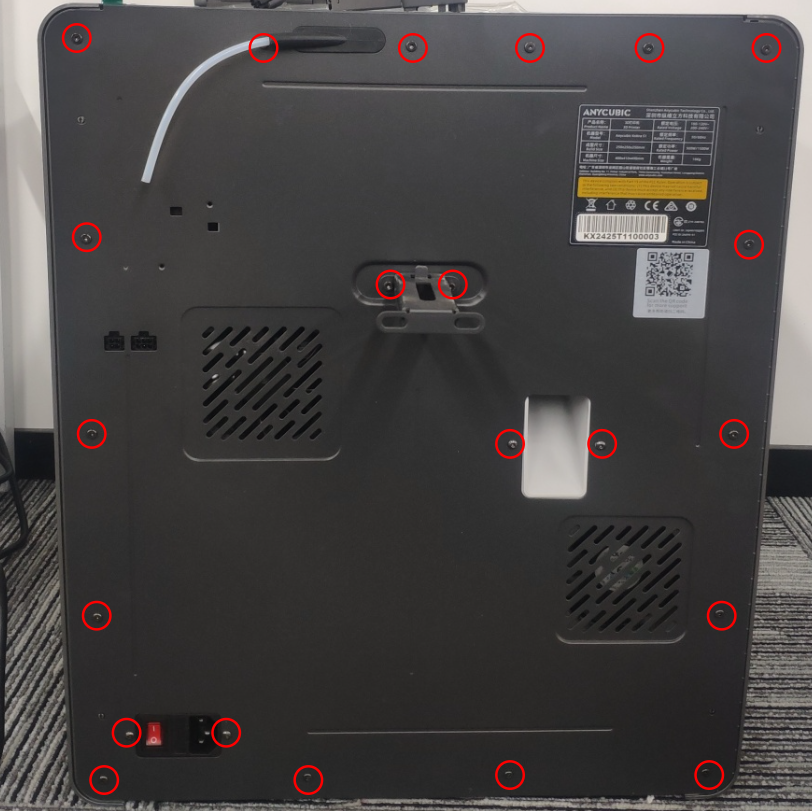
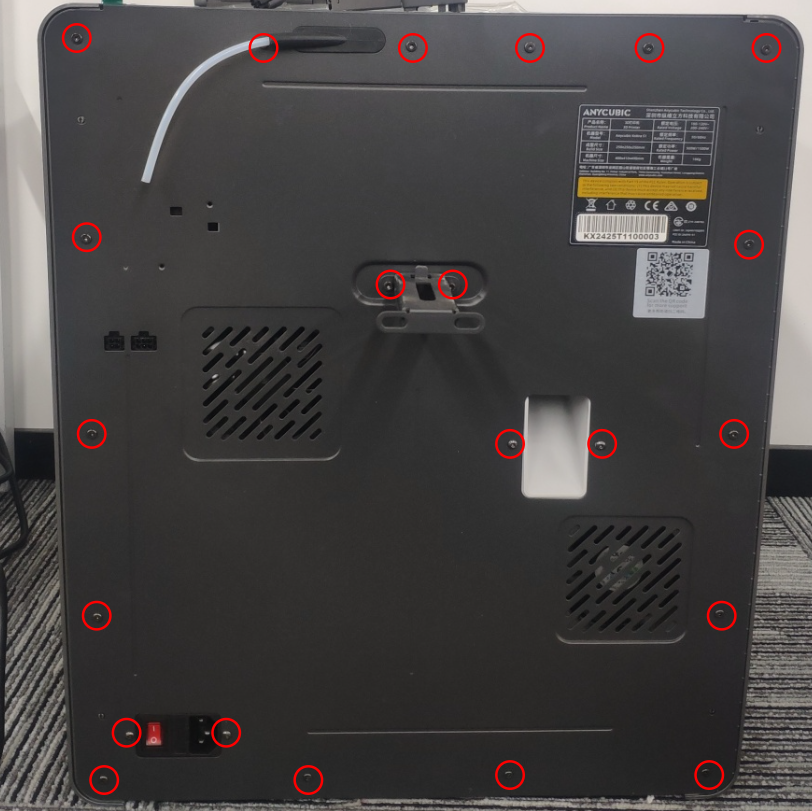
Use the S2.0 Allen key to unscrew the rear cover fixing screws.
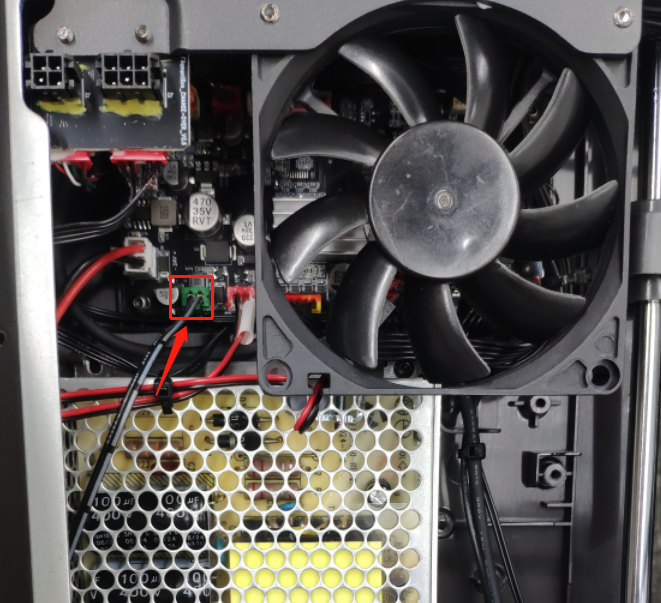
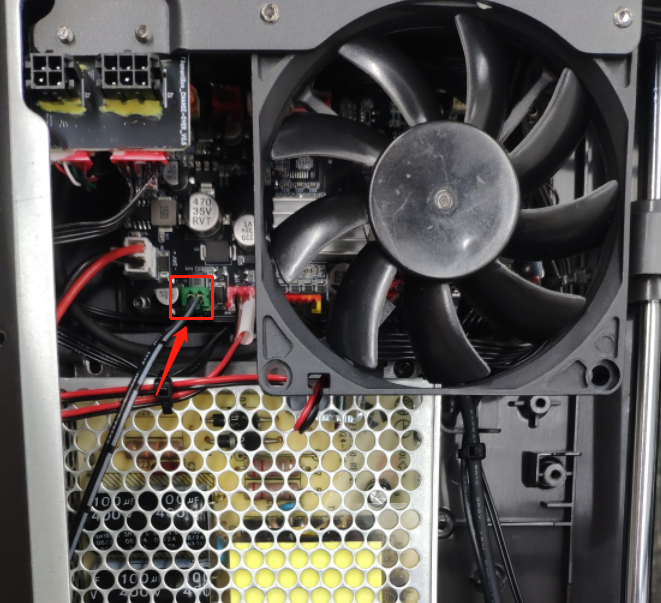
2. Unplug the auxiliary cooling fan plug
Step 2: Remove the two side covers
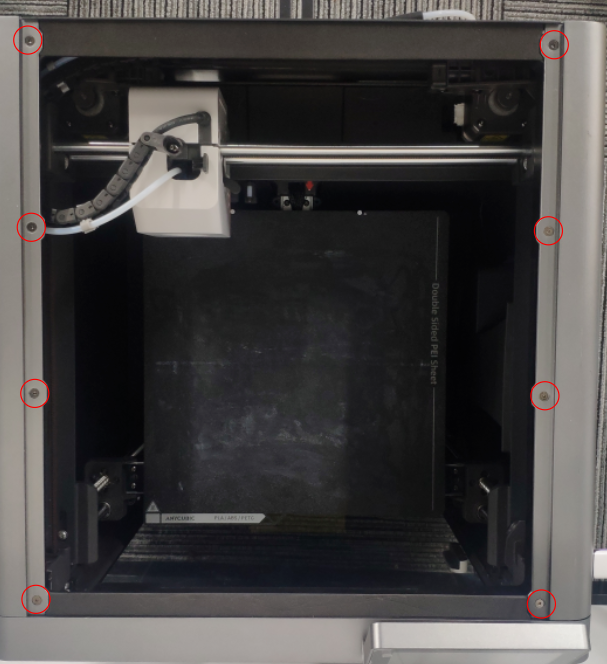
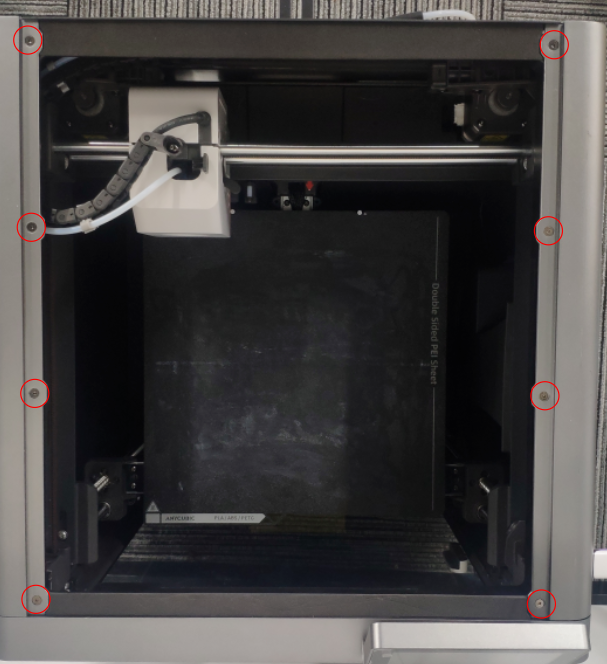
1. Use the S2.0 Allen key to unscrew the top side cover fixing screws.
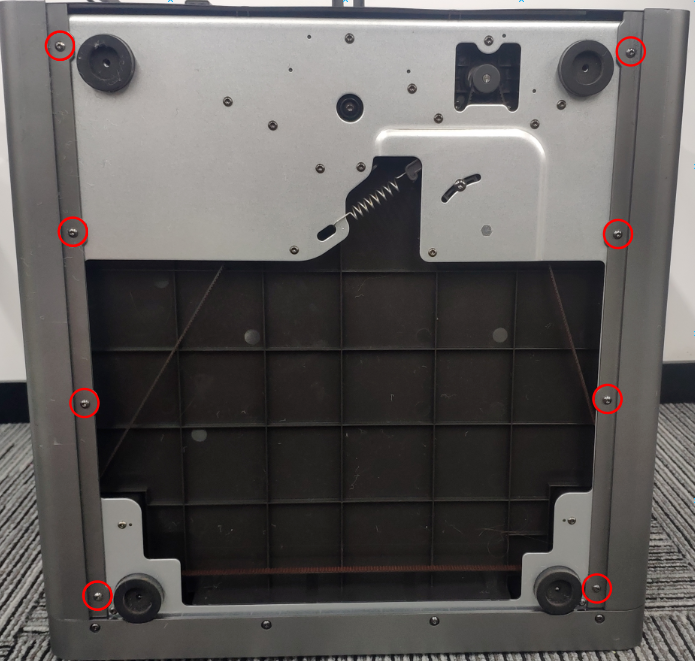
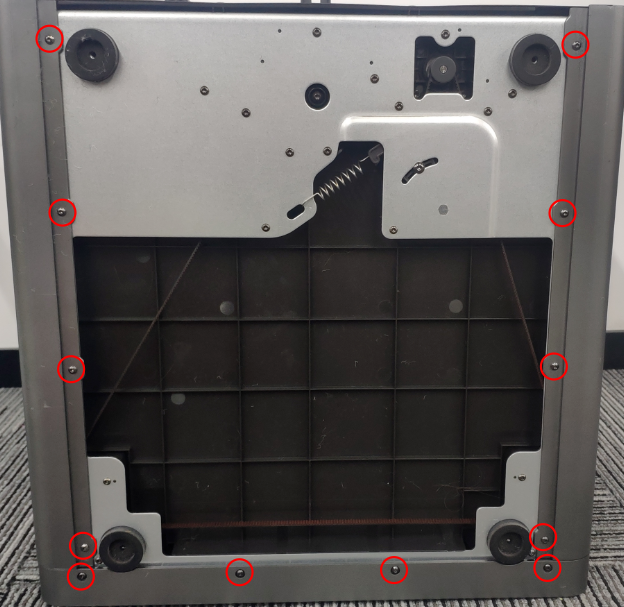
2. Use the S2.0 Allen key to unscrew the bottom side cover fixing screws.
Step 3: Remove the front door
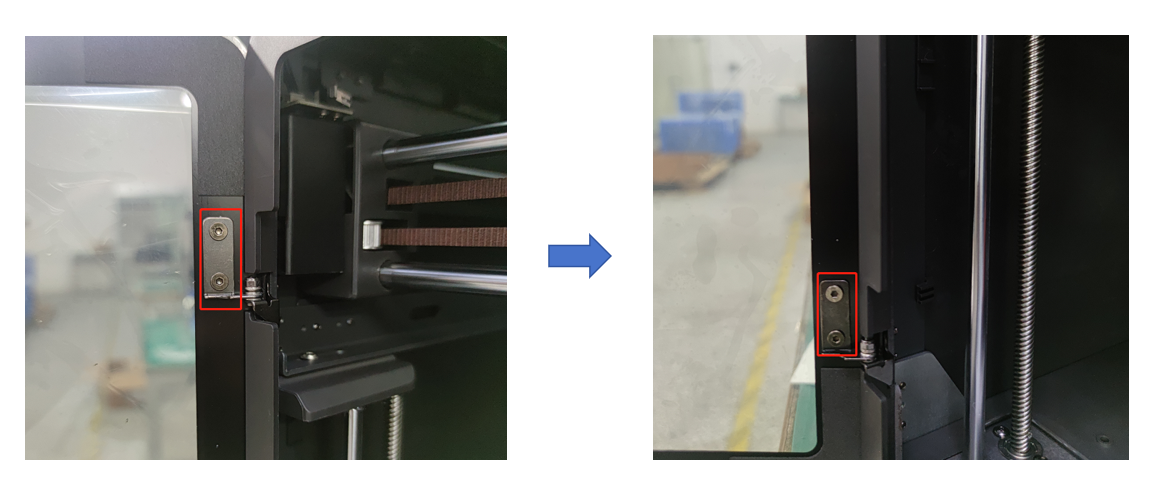
Use the S2.0 Allen key to unscrew the front door fixing screws.
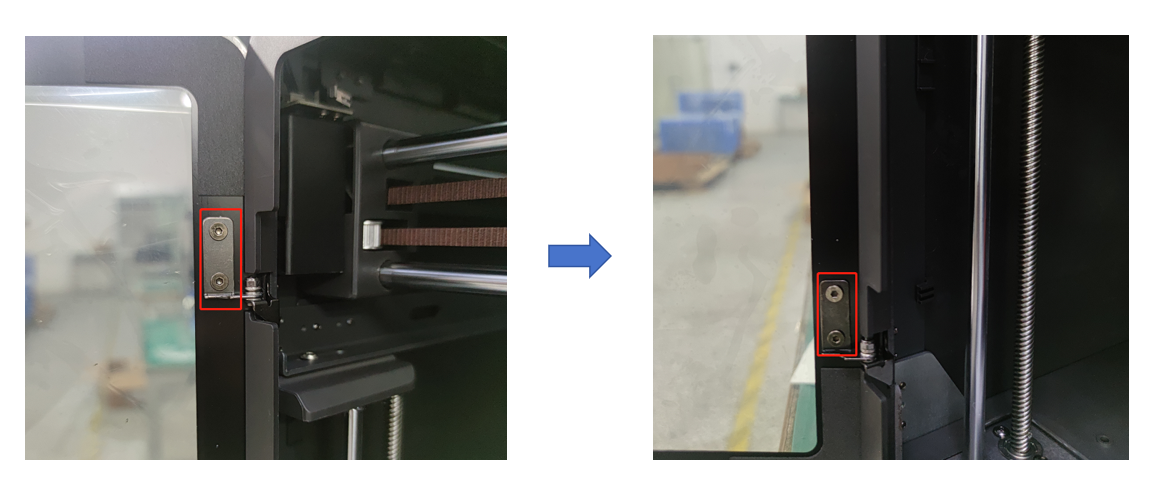
Step 4: Disassemble the control screen assembly
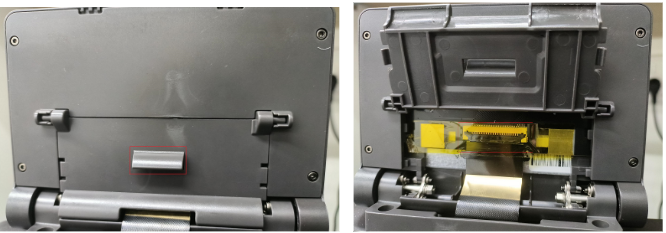
1. Open the baffle of the control screen cable, tear off the tape fixing the cable and then unplug the control screen cable.
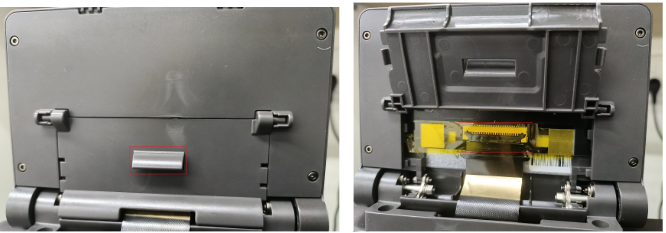
2. Use an S2.0 Allen key to unscrew the screws of the control screen assembly.
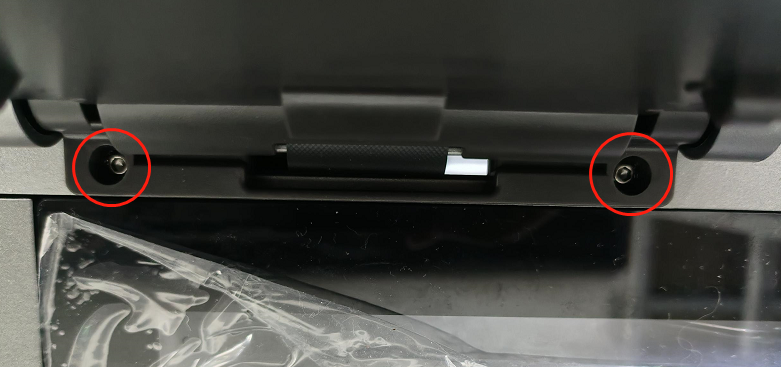
Step 5: Remove the front cover
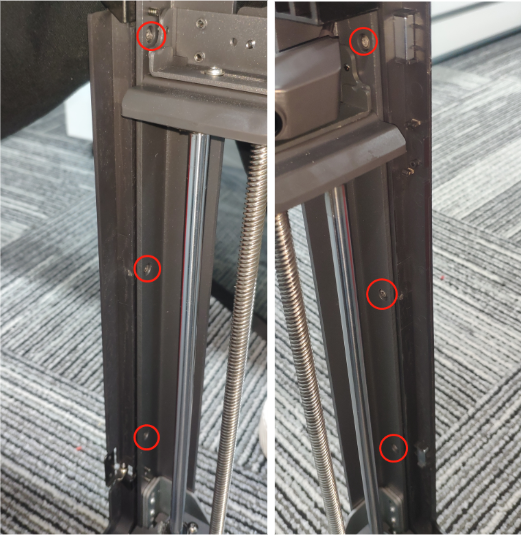
1. Use an S2.0 Allen key to unscrew the bottom screws of the bottom front cover.
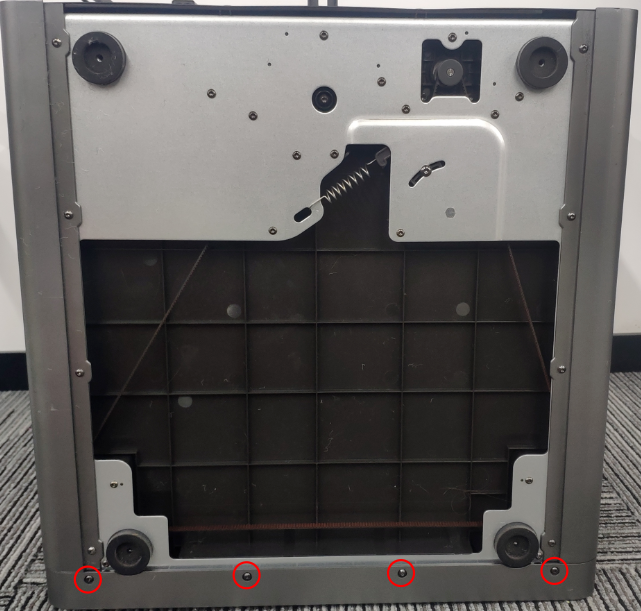
2. Use an S2.0 Allen key to unscrew the front cover screws.
3. Installation steps:
Step 1: Install the front cover
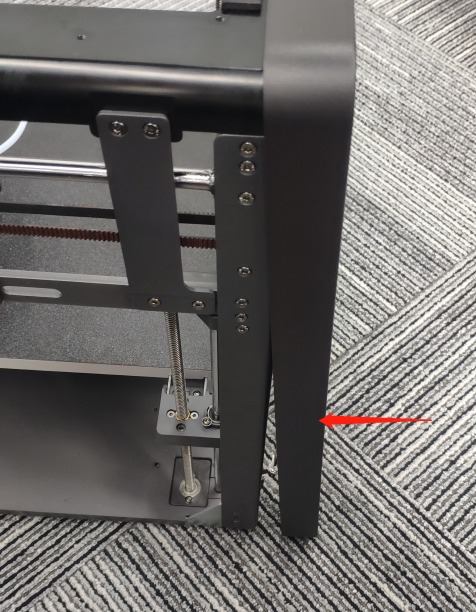
Use an S2.0 Allen key to tighten the front cover screws.
Step 2: Install the control screen assembly
1. Use an S2.0 Allen key to tighten the touch screen assembly screws.
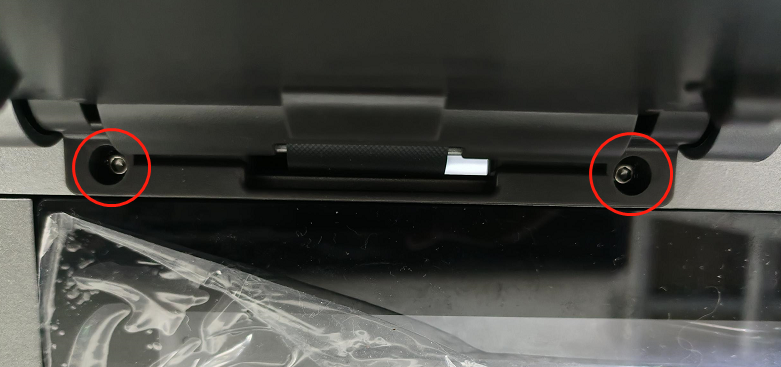
2. Open the baffle of the control screen cable, connect the cable back to the control screen, and then cover the baffle.
Step 3: Install the two side covers
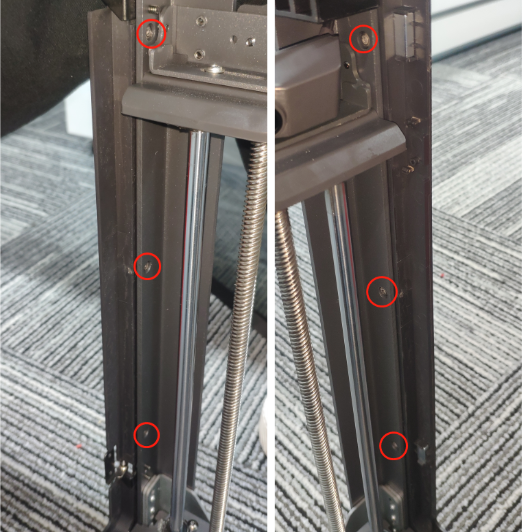
1. Use an S2.0 Allen key to tighten the top side cover screws.
2. Use an S2.0 Allen key to tighten the bottom side cover and front cover screws.
Step 4: Install the front door
Use an S2.0 Allen key to tighten the front door fixing screws.
Step 5: Install the rear cover
1. Plug the auxiliary cooling fan plug into the motherboard terminal.
2. Use an S2.0 Allen key to tighten the rear cover fixing screws.
Was this article helpful?
That’s Great!
Thank you for your feedback
Sorry! We couldn't be helpful
Thank you for your feedback
Feedback sent
We appreciate your effort and will try to fix the article