Replacing the mainboard on your Creality K2 Plus can resolve hardware issues such as communication failures, unexpected crashes, or unresponsive controls . The mainboard is located in the lower left corner at the back of the printer and requires careful handling of wiring to avoid secondary damage . This guide provides clear, step-by-step instructions for safely removing the old board and installing a new genuine Creality motherboard kit, including necessary tools, wiring precautions, and post-installation testing .
TABLE OF CONTENTS
- Spare Parts:
- Install Video:
- Written Guide:
- 1. Power off and unplug the power cord
- 2. Use H2.0 and H2.5 hexagonal wrenches to remove the screws on the back and take off the back panel
- 3. Unplug all the wires from the mainboard
- 4. Use H2.0 hexagonal wrench to remove the four M3 screws on the mainboard
- 5. Remove the damaged mainboard
- 6. Place the new mainboard, pay attention to the direction and align the holes
- 7. Plug in the power cord and turn on the printer.
- 8. After testing, power off and unplug the power cord
- 9. Organise the cables and secure them in place with cable ties.
- 10. Install the back panel using H2.0 and H2.5 hexagonal wrenches to fasten the screws on the back.
Spare Parts:
Replacement Mainboard, available in Australia, shipping worldwide.
Install Video:
Written Guide:
Source:https://wiki.creality.com/en/k2-flagship-series/k2-plus/replace-mainboard
Tools Required:
- H2.0 hexagonal wrench
- H2.5 hexagonal wrench
- Cutting pliers
- Cable ties
- New mainboard
Location
The mainboard is located in the lower left corner at the back of the machine
Steps
Removing the mainboard
1. Power off and unplug the power cord
2. Use H2.0 and H2.5 hexagonal wrenches to remove the screws on the back and take off the back panel
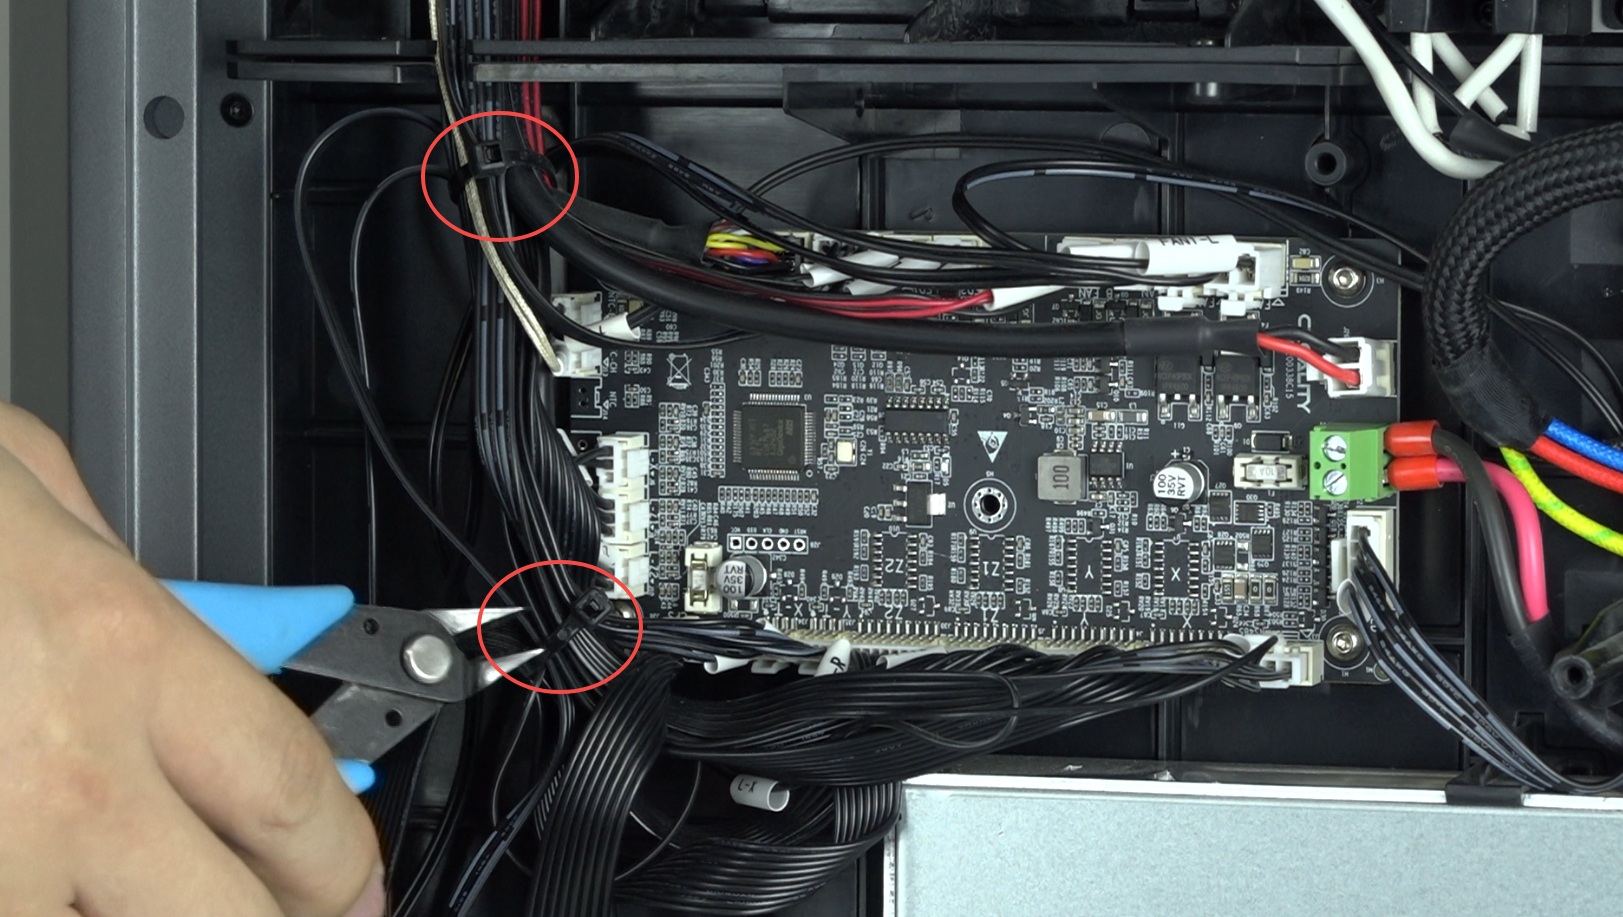
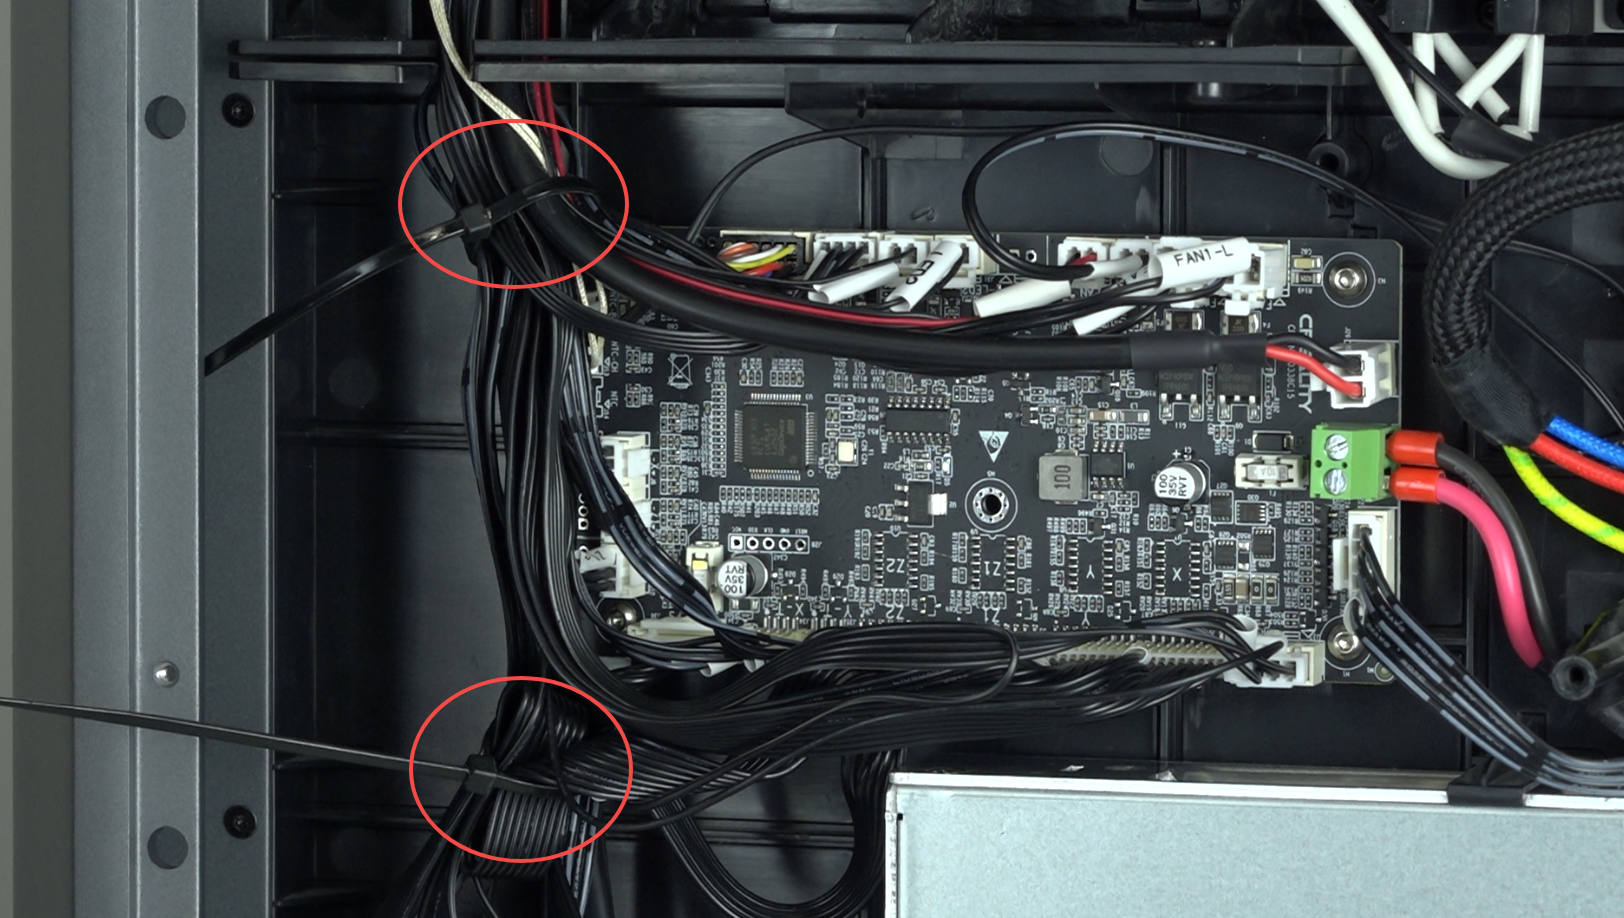
Use cutting pliers to cut the cable ties. Note: be careful not to cut any ribbon cables
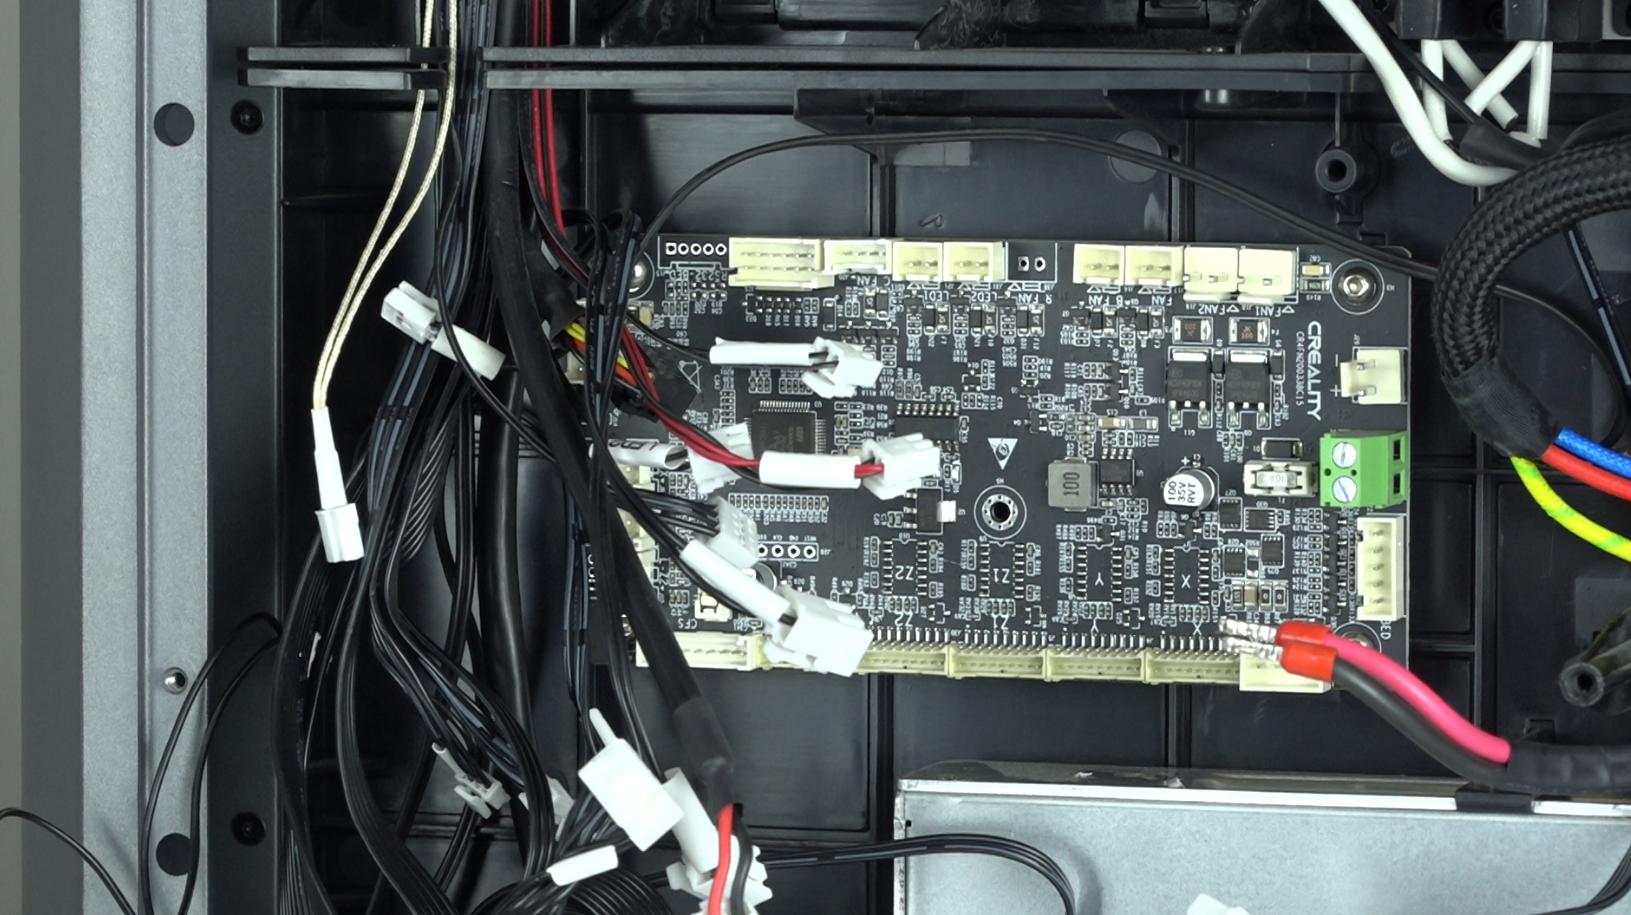
3. Unplug all the wires from the mainboard
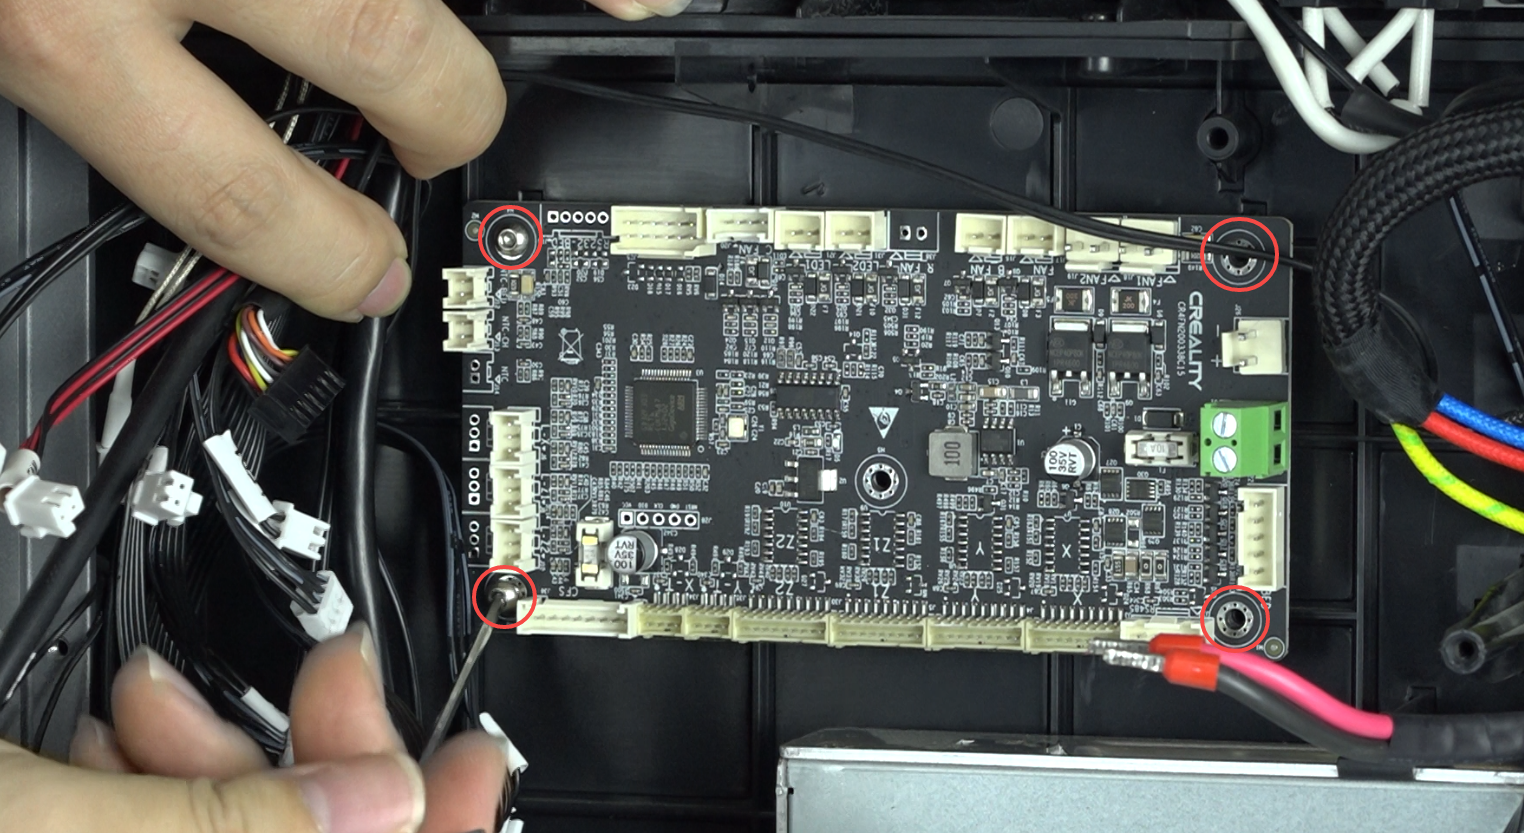
4. Use H2.0 hexagonal wrench to remove the four M3 screws on the mainboard

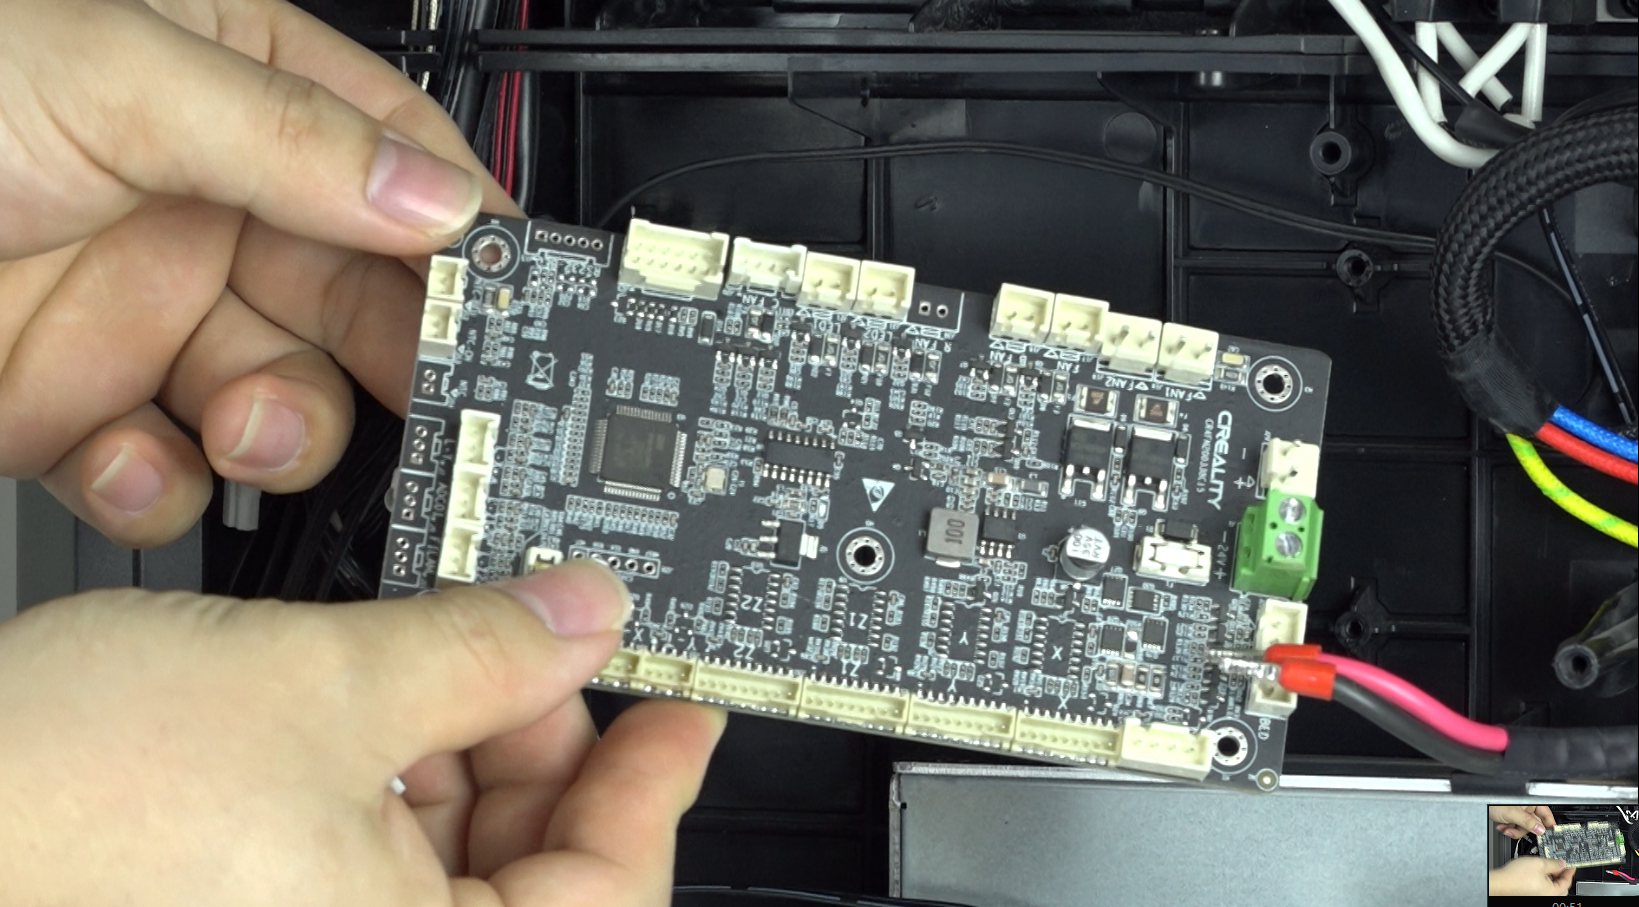
5. Remove the damaged mainboard
Install the mainboard
6. Place the new mainboard, pay attention to the direction and align the holes
Use H2.0 hexagonal wrench to install the four M3 screws on the mainboard.
Refer to the mainboard wiring diagram to plug in all the wires to the mainboard. Note: do not plug in any wire incorrectly, otherwise it will cause secondary damage to the machine.
Test
7. Plug in the power cord and turn on the printer.
Touch the screen, test the machine's heating, movement and other functions, check if the machine is working normally
8. After testing, power off and unplug the power cord
Final Step
9. Organise the cables and secure them in place with cable ties.
10. Install the back panel using H2.0 and H2.5 hexagonal wrenches to fasten the screws on the back.
Was this article helpful?
That’s Great!
Thank you for your feedback
Sorry! We couldn't be helpful
Thank you for your feedback
Feedback sent
We appreciate your effort and will try to fix the article