Source: http://lukeslab.info/en/Recovering-A-Bootloader
29 Aug 2024 - Parker Drouillard
TABLE OF CONTENTS
Note: We have added few more link to boot loader for other common BTT Boards, Do note, some board will allow you flash
Introduction
If you're anything like me, then you likely break things quite often. If you're reading this guide in particular, then either you are a curious individual whom wants to learn, or you're in a similar situation to what I was; you went and shifted the bootloader offset on your BTT motherboard whilst using the make and make menuconfig commands to flash your board. Not to worry! We should be able to recover it in due time.
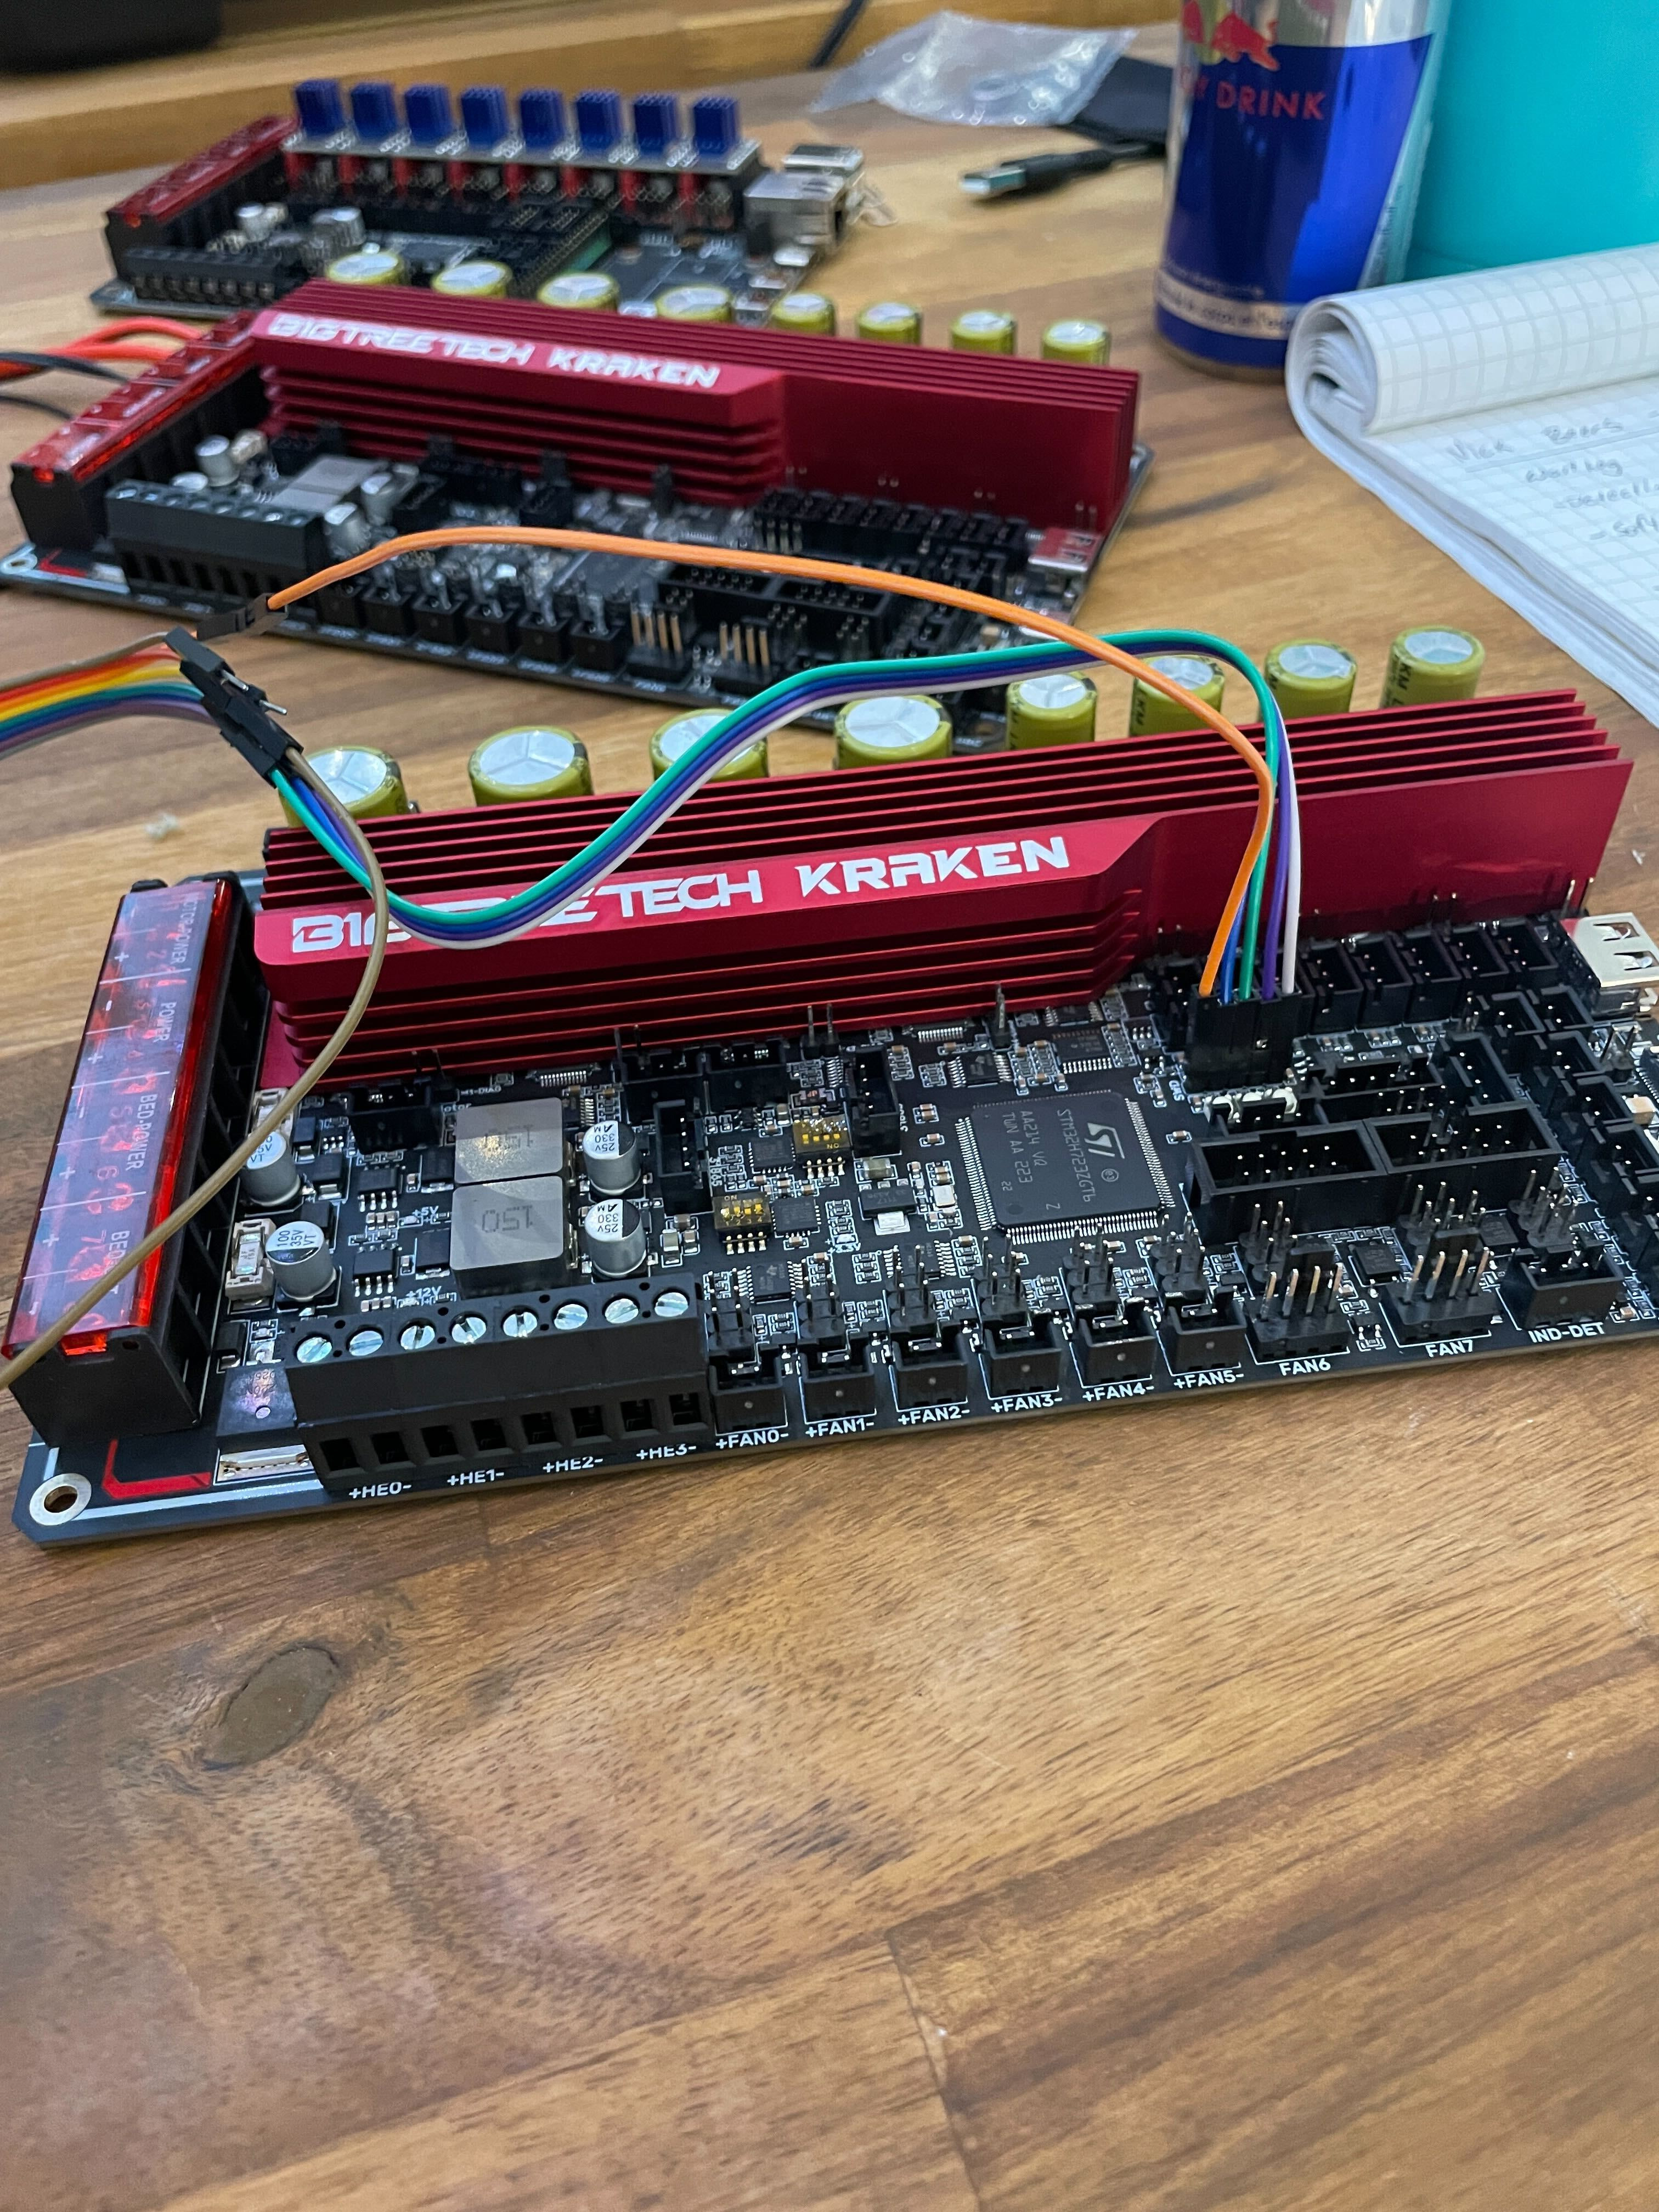
This guide is intended to help anyone using a motherboard with STM32 architecture, it is not specific to only BigTreeTech boards. In my case, I was using the BTT Kraken motherboard which you will see in the photos.
Pre-Requisites
You'll need a few things before we get started.
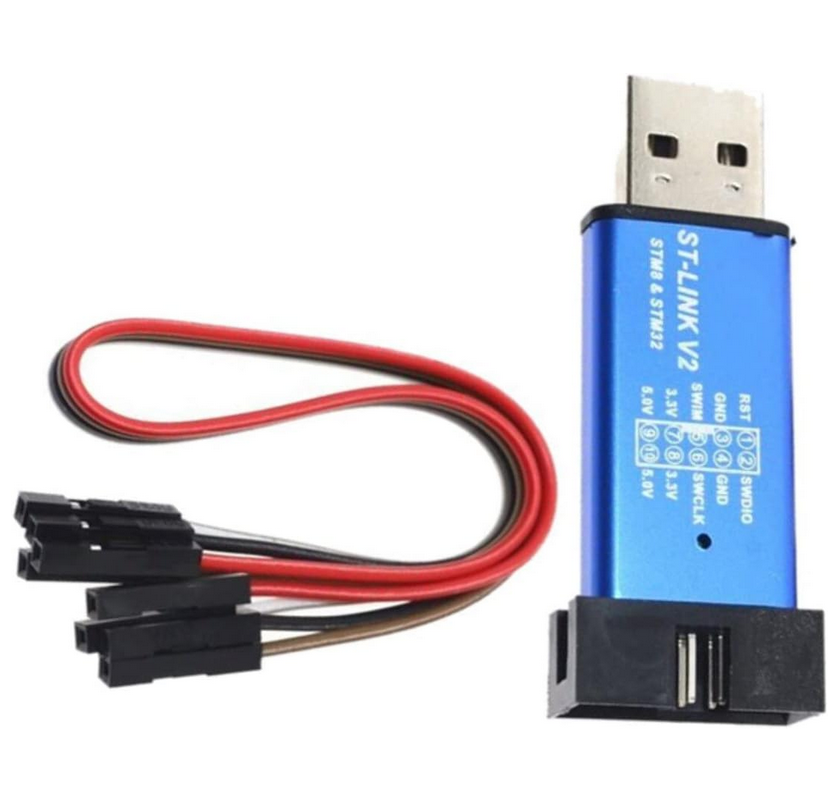
1: An ST-Link tool for connecting to the chip. Something like the photo below.
Search for ST LINK V2
2: Direct access to your motherboard
3: A laptop with a USB connection and a few software tools (we'll get there in a moment)
4: The bootloader provided by your board manufacturer.
Software install
First we will need the STM programmer required by the device we are using to connect to the chip. In my case, I started off with the STM32 ST-Link software from st.com, but this ended up being incorrect for my device. In case your equipment requires it, a link to the software is here:
https://www.st.com/en/development-tools/stsw-link004.html
In our case if you are using the above device, we actually require the STM32 Cube Programmer. Don't ask me why, because frankly I do not know. This was a particularly frustrating day of troubleshooting for me and I was just happy when things were finally progressing. Any inclination I had to deep dive this even further had long since passed my existence.
The STM32CubeProgrammer can be found here for download:
https://www.st.com/en/development-tools/stm32cubeprog.html
Setup
Ensure your motherboard is disconnected from any other power source. We are going to be powering the board directly from the ST-Link over the header pins. This whole process is easier if you are able to remove your motherboard from the machine and connect to it at your desk, although I can definitely understand that's not always convenient (When I originally did this I was laying on my side working deep inside the affected machine's electronics panel. No chance was I going through all the effort of unplugging all the associated cables + boards blocking the way to getting it out).
Locate your device's schematics or pinout. We are looking for a few specific pins:
SWCLK
RST
SWDIO
GND
3.3V
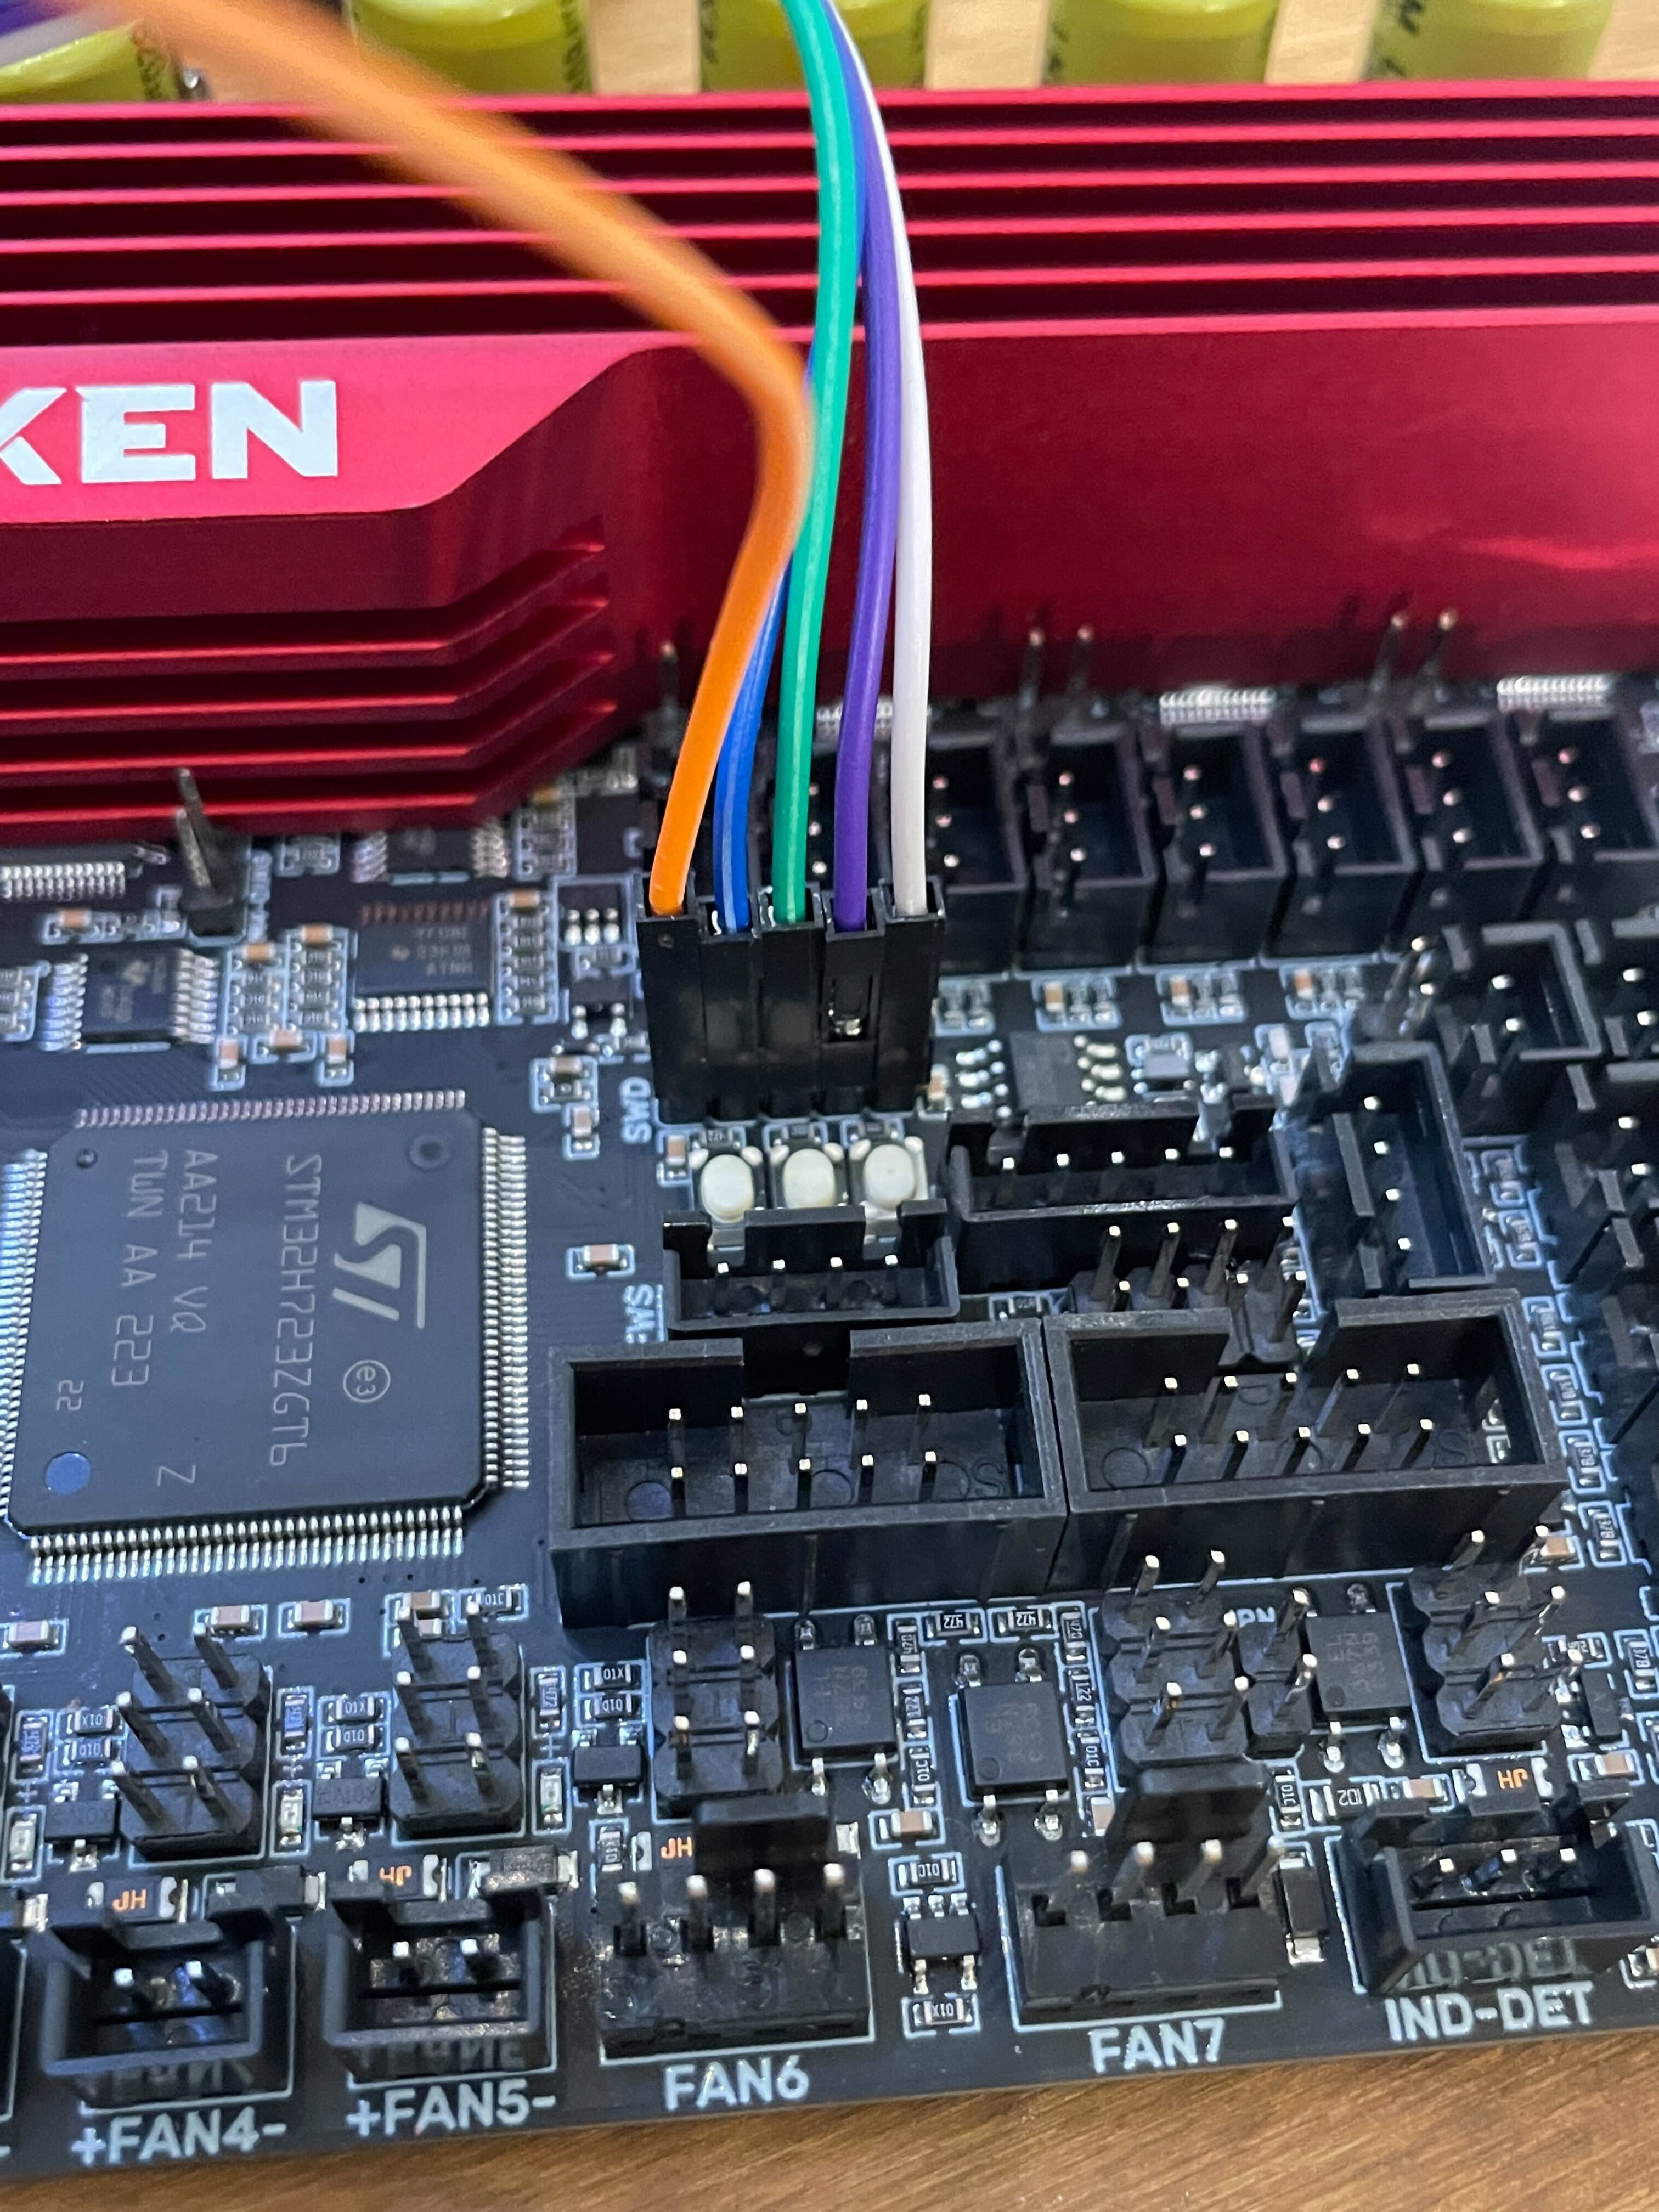
For the BTT Kraken motherboard, these pins were located on the SWD grouping of pins. I've screen captured the portion of the schematic which calls this out, but I strongly recommend you find these and confirm them for yourself even if you are using the BTT Kraken (I can't ensure things haven't changed at whatever point in the future you are reading this guide.) You can expect the call out in schematics to be on or near the main chip page, and the pins to be near any boot buttons on the board.
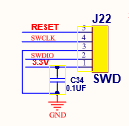
The label SWD in this case is the indicator on which way around the pins on the board will be. Labelled next to this grouping of pins is SWD, meaning the pins will be in order from there (3.3, SWDIO, GND, SWCLK, RST in this case)
Double check your pins are correct (in some cases, such as this board, there are printed labels on the back side). If everything is set, you can go ahead and plug the device into your computer. Your device should power up.
Connecting and flashing your device
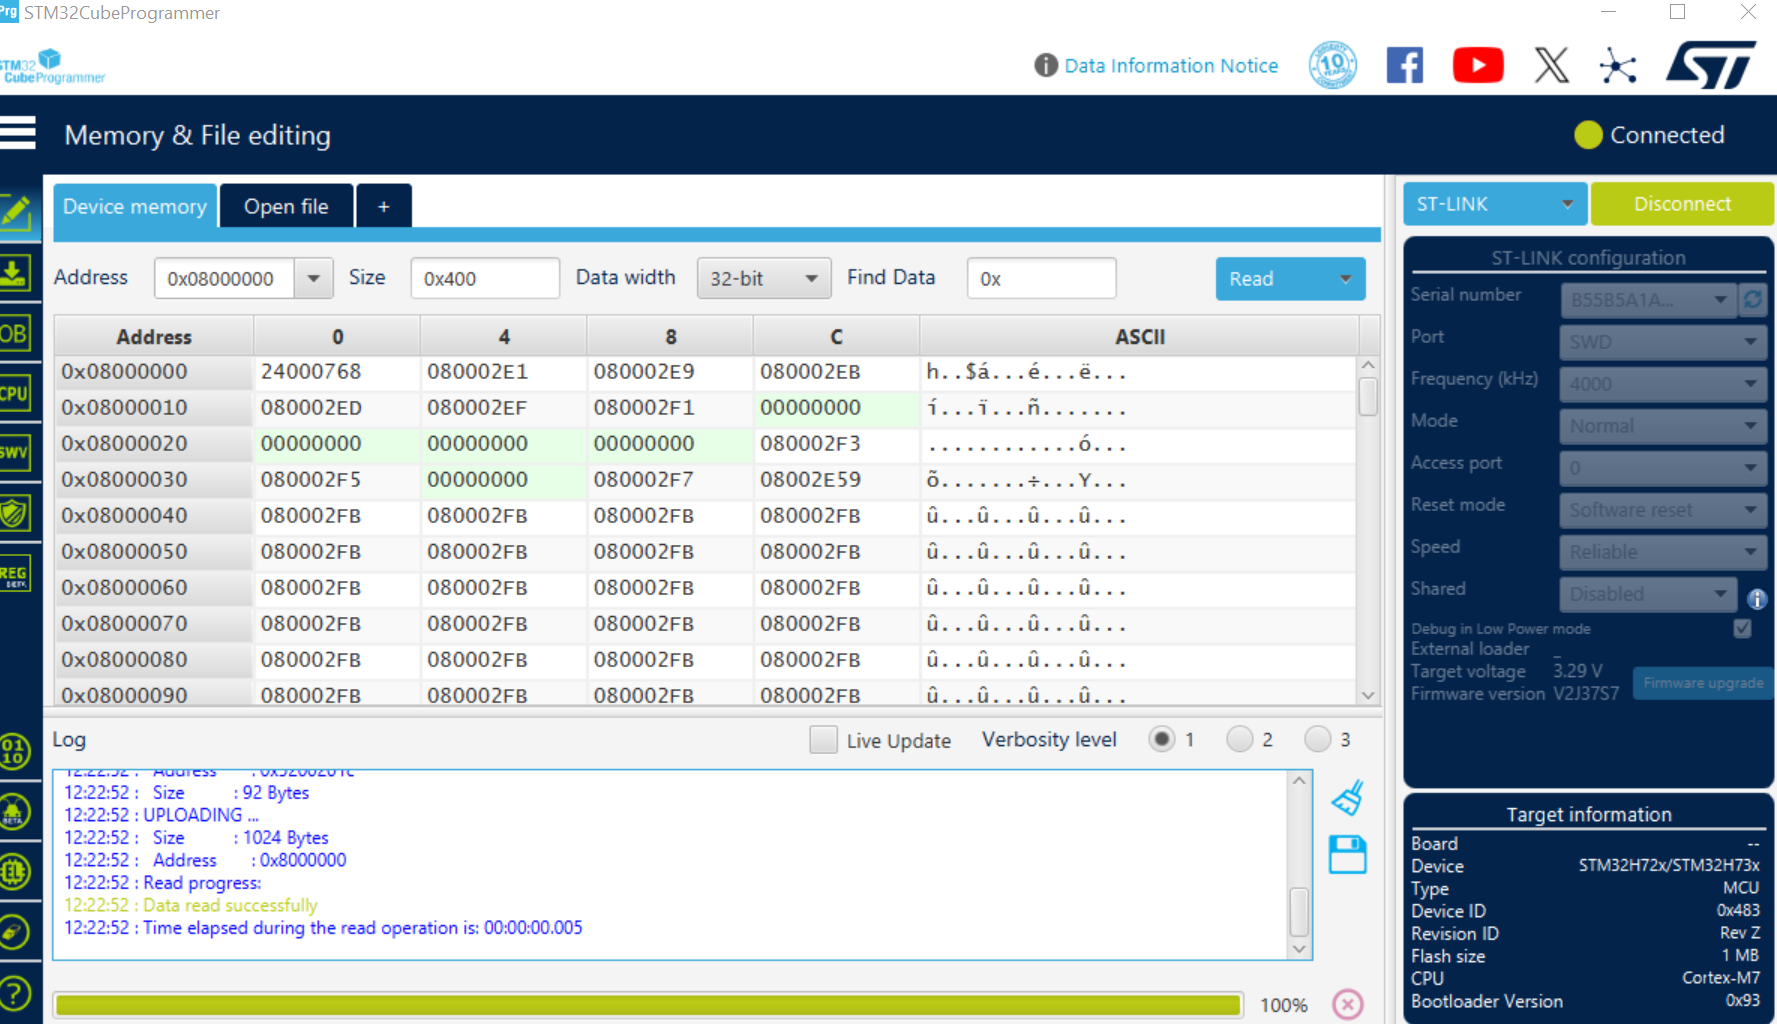
Go ahead and fire up the Cube programmer tool.
Ensure that you have downloaded the associated bootloader for your board.
For the BTT Kraken, this was available on the github page under Firmware.
https://github.com/bigtreetech/BIGTREETECH-Kraken/blob/master/Firmware/Kraken_H723_bootloader.bin
For SKR 3
https://support.dremc.com.au/en/support/solutions/articles/51000343648-skr-3-h723-bootloader
For SKR1.4
For Octopus (Can be performed over USB)
Connect to your board using the Cube programmer tool (Green button on the top right). If you are having trouble, or the software says no COM detected, ensure you have selected ST-LINK as the connection type and not UART or one of the other options.
Additionally, you may need to try and put the board into DFU mode. In the case of the Kraken, you can achieve this by pressing and holding the BOOT0 button (Middle one), followed by a quick press of the RESET button, followed by you then releasing the BOOT0 button.
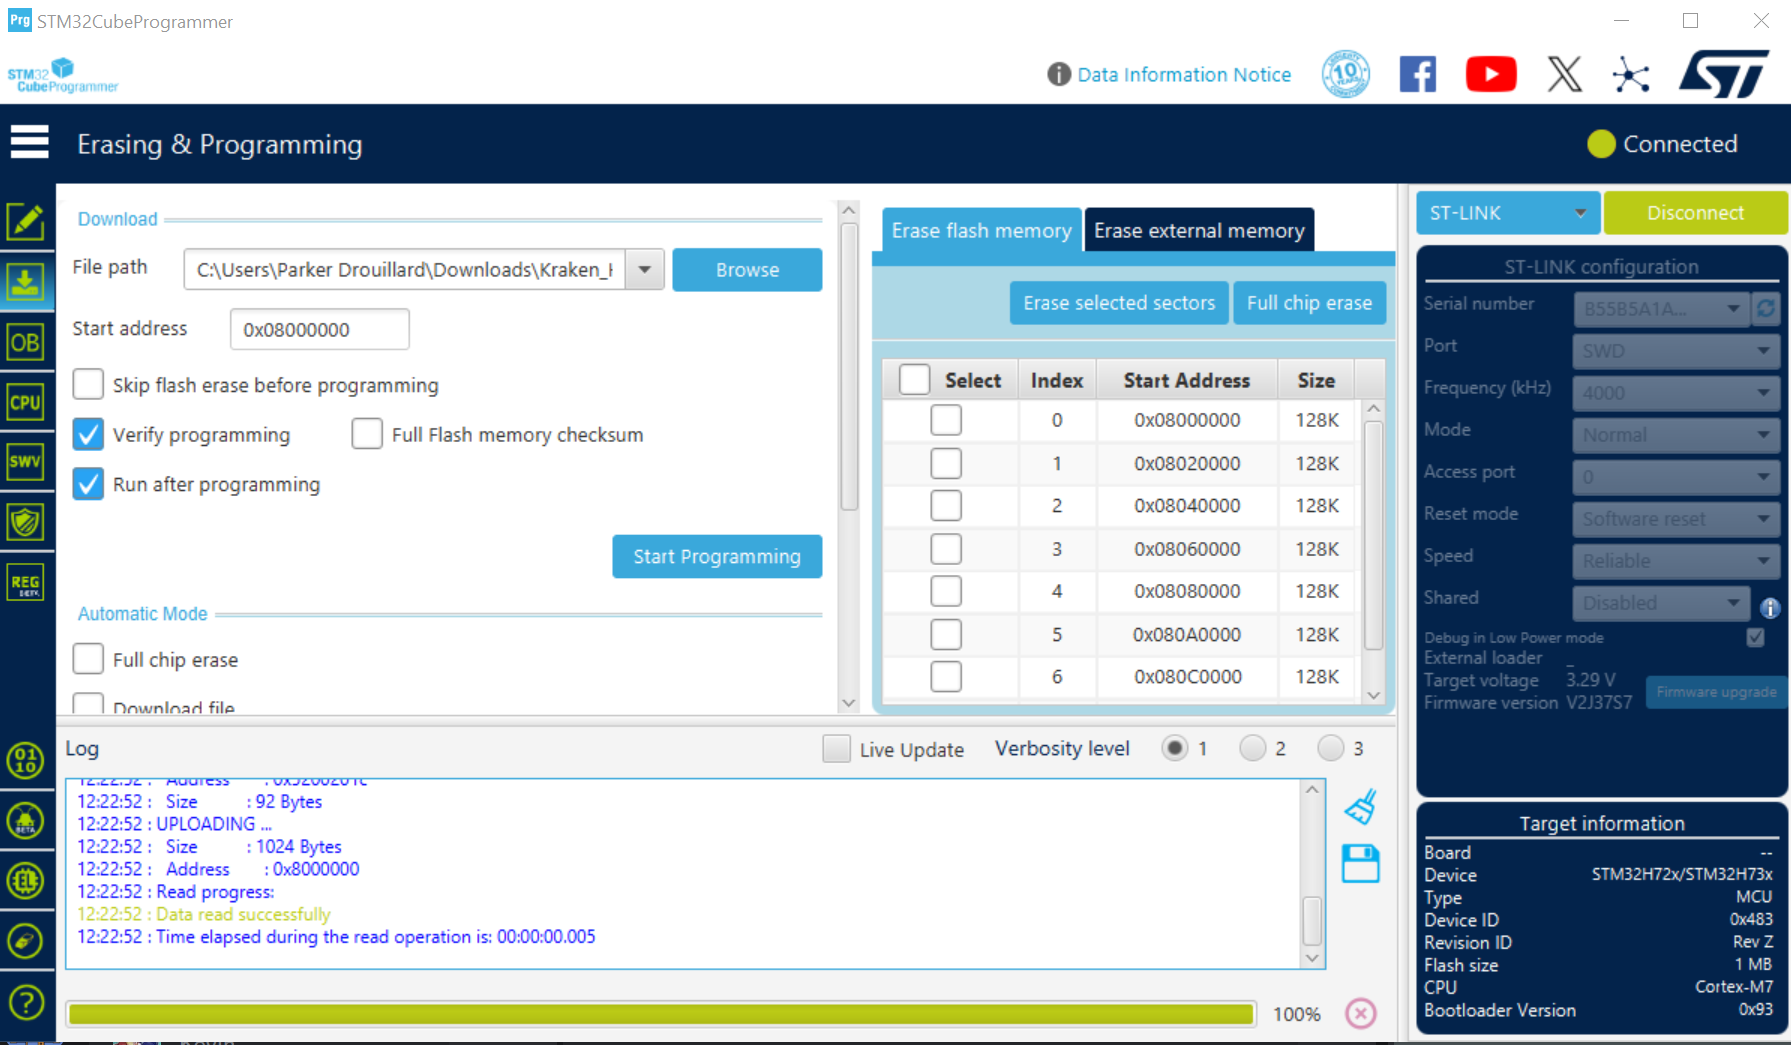
Navigate to the “Erasing & Programming” tab, second on the left at the time of writing this.
Select the path to the Bootloader BIN you downloaded.
!! Important - Ensure that your start address is correct for your motherboard. For the chip on the Kraken, the default offset of 0x08000000 was correct.
Now all that's left is to hit start programming!
After it's complete, you may get an error about it losing connection, that's OK. Unplug the device & you should be all set to go back into operation! You should be able to resume normal DFU and klipper flashing processes now that you've successfully recovered the manufacturer's bootloader onto this board.
Happy printing!
Was this article helpful?
That’s Great!
Thank you for your feedback
Sorry! We couldn't be helpful
Thank you for your feedback
Feedback sent
We appreciate your effort and will try to fix the article