Replacing the motherboard on your Creality CFS 3D printer can seem daunting, but with the right guidance, it's a manageable process. This comprehensive guide provides a video and written step-by-step walkthrough of the motherboard replacement process, including detailed instructions, to help you successfully replace your motherboard and get back to printing high-quality parts with optimal performance and reliability.
TABLE OF CONTENTS
- Spare Parts
- Install Video:
- Written Guide:
- 1. Remove Loaded Filament from CFS and tilt the AMS on the side.
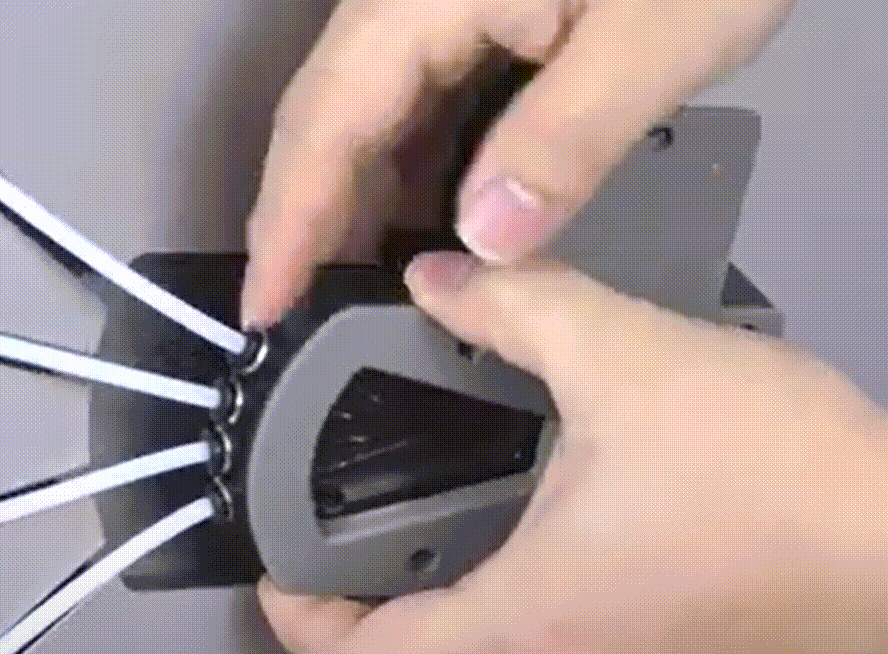
- 2. Remove the hub outlet assembly by unscrewing three screws.
- 3. Remove the filament tube.
- 4. Unscrew three screws.
- 5. Position the CFS correctly and open the top cover.
- 6. Remove the independent filament intlet. (Please take care with wiring)
- 7. Remove the front cover.
- 8. Unscrew two screws from the front cover.
- 9. Remove 7 screws.
- 10 .Remove the adapter board.
- 11. Remove the bottom shell.
- 12. Disconnect the mainboard wiring
- 13. Disconnect the wiring from the mainboard
- 14. Remove the mainboard by unscrewing three screws
- 15. Install the new mainboard and tighten the screws
- 16. Connect the mainboard wiring, make sure not to plug wires into wrong ports
- 17. Plug in the wires and tighten the screws
- 18. Install the bottom shell, pay attention to exposed wiring
- 19. Re-Tighten two screws on the front cover
- 20. Re-Install the front cover
- 21. Re-Install the filament intlet, place the filament tube properly, and plug in the wires
- 22. Install the adapter board
- 23. Re-Install 7 screws
- 24. Turn the machine upside down and re-tighten 10 screws
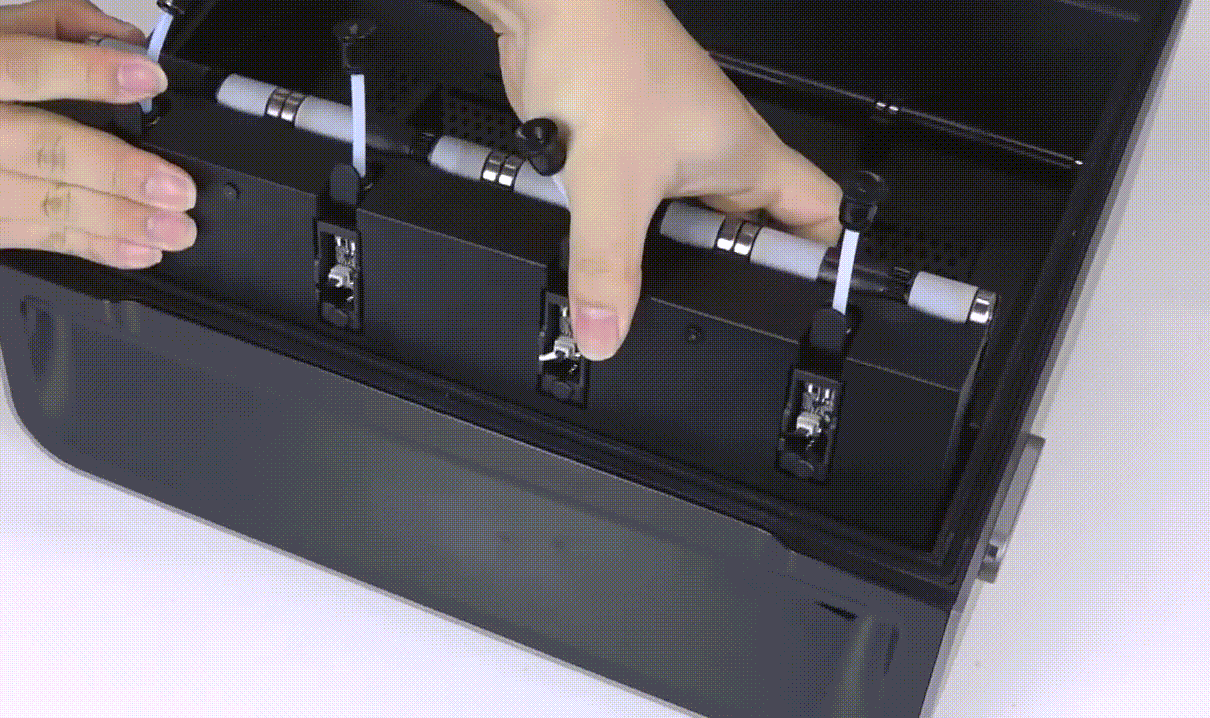
- 25. Install the hub outlet assembly
Spare Parts
Spare Part Referenced In this Guide: https://store.dremc.com.au/products/creality-cfs-motherboard-kit
Install Video:
Written Guide:
Source/Credit: https://wiki.creality.com/en/cfs/replace-cfs-mainboard
1. Remove Loaded Filament from CFS and tilt the AMS on the side.

2. Remove the hub outlet assembly by unscrewing three screws.

3. Remove the filament tube.

4. Unscrew three screws.

5. Position the CFS correctly and open the top cover.

6. Remove the independent filament intlet. (Please take care with wiring)
7. Remove the front cover.


8. Unscrew two screws from the front cover.

9. Remove 7 screws.

10 .Remove the adapter board.

11. Remove the bottom shell.


12. Disconnect the mainboard wiring
Note: Be careful not to damage the wires or ports (You can use dab of iso alcohol to loosen any hot glue on the connectors)


13. Disconnect the wiring from the mainboard
Note: When cutting the yellow/hot glue with cutting pliers, be careful not to cut the wires, otherwise you can use some ISO Alcohol to loosen up the hot glue

14. Remove the mainboard by unscrewing three screws

15. Install the new mainboard and tighten the screws


16. Connect the mainboard wiring, make sure not to plug wires into wrong ports

17. Plug in the wires and tighten the screws

18. Install the bottom shell, pay attention to exposed wiring


19. Re-Tighten two screws on the front cover

20. Re-Install the front cover

21. Re-Install the filament intlet, place the filament tube properly, and plug in the wires


22. Install the adapter board

23. Re-Install 7 screws

24. Turn the machine upside down and re-tighten 10 screws

25. Install the hub outlet assembly
Tighten three screws and organise the filament tube

Was this article helpful?
That’s Great!
Thank you for your feedback
Sorry! We couldn't be helpful
Thank you for your feedback
Feedback sent
We appreciate your effort and will try to fix the article